Temenos Lifecycle Management Suite - Origination Product Guide
Reports Administration
| Administrator Guide > Desktop and Ribbon Bar > Reports > Reports Administration |
New reports can be created to view information about applications in Temenos Infinity. Reports can run and managed from the Work section in the Ribbon Bar.

Clicking  in the Ribbon bar opens the Reports page. From this page, administrators are able to create, copy, edit, and delete reports.

 |
The  button is only enabled for Advanced Report building. For more information on this feature, contact a Temenos Account Manager and/or refer to the Advanced Report Builder section within this guide. button is only enabled for Advanced Report building. For more information on this feature, contact a Temenos Account Manager and/or refer to the Advanced Report Builder section within this guide. |
All reports share common attributes that are defined when creating, copying, and editing a report.
Within the Define tab, enter the general information for the report.
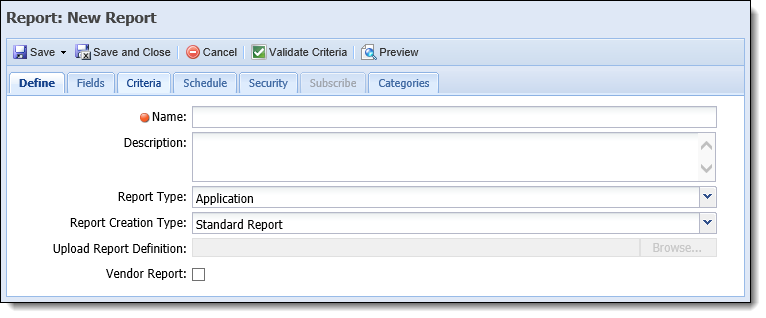
The following attributes are defined within this tab:
| Attribute | Description | ||||||||
| Name | Enter a name for the report. This is a required field. | ||||||||
| Description | If necessary, enter a description for the new report. | ||||||||
| Report Type |
Select a Report Type from the drop-down. This determines what fields are included within the report data. The following report types are available for selection:
|
||||||||
| Report Creation Type |
Select the Report Creation Type from the drop-down. The following options are available:
|
||||||||
| Upload Report Definition | Click Browse to upload a saved RDL file. This field is only enabled for Pre-defined reports. | ||||||||
| Vendor Report |
Select the check box to identify the report as a vendor report.
By default, this check box is set to false. When set to true, the report populates as an option to assign to a vendor for use in a vendor instance of Virtual Capture. A two-box control populates within the Security tab in the report configuration window to assign vendors to the report, and the report is listed as an available option to assign to a specific vendor within the Vendor Portal Reports tab in Vendor Management.
|
|
The Fields tab is only enabled when a Standard Report is being created. |
Field attributes enable administrators to select the fields that display in the report. The order that the fields are listed in this tab determines the order in which they appear within the report.

The Fields tab displays the following columns of information about each field:
| Column Name | Description | ||
| Field Path | Displays the path of the field in the database. | ||
| Display Name | The name of the field as it appears in the report. Users can change the name by clicking within the column. | ||
| Sort | Defines how the field data is displayed. Clicking within the column opens a drop-down in which the user can select None, Ascending, or Descending. | ||
| Sub Total |
Performs calculations at a group level. Clicking within this column opens a drop-down including the following options:
|
||
| Grand Total |
Performs a total calculation for all records in the report according to the calculation type selected. Clicking within this column opens a drop-down including the following options:
|
||
| Decimal Places | Defines the number of decimal places. This column is used for interest rates only. |
Prior to adding fields to a report, it is recommended to review the following to ensure the expected data populates in the report:
|
For more information, please see the Field List Configuration topic in this guide. |
 |
Any headings, numbering, color, and/or indentation applied to the comment text does display for the Formatted Comment fields in the report. |
|
By default, the CSS tags for the text formatting populate in the Formatted Comment fields when the report is generated. Watch the video below for an overview on how to remove the tags, and only populate the formatted text in the report:
|
|
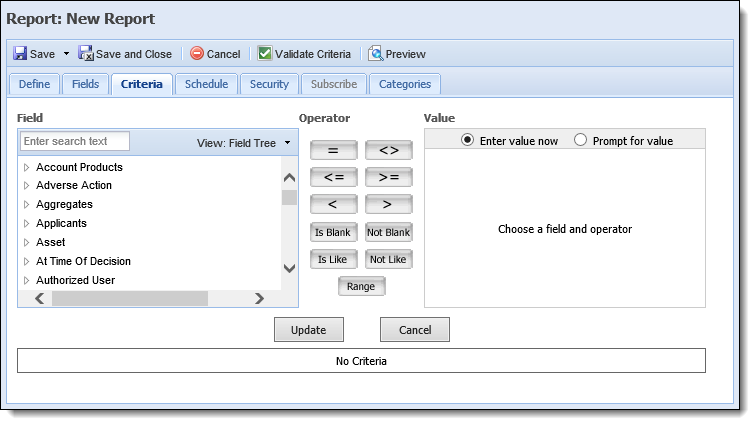
The Criteria tab is only enabled when a Standard Report is being created. |
Within the Criteria tab, use the criteria builder to specify what data is included in the report.
 |
When a date range is not specified within the report criteria and the report is configured to prompt the user to enter a date range, the End Date range assumes a time of 00:00:00 if a time is not appended to the end date when the report is run. To ensure information for the desired end date is included within the report, users can add a time in 00:00:00 format to the End Date or select a date that is one day ahead of the desired end date. For example, if a report is to include information from 4/1/2015 to 4/28/2015, in order to ensure information for 4/28/2015 is included, a date range of or 4/29/2015 or 4/28/2015 11:59:59 PM must be entered as shown in the below example:
|
For more information on the Criteria Builder, see the Criteria Builder Help topic within this guide.
Within the Schedule tab, determine if the new report is to run on demand or based on a schedule.
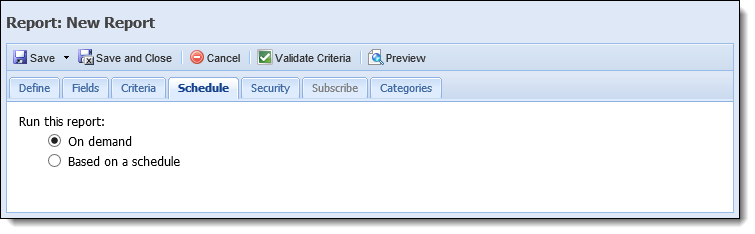
If Based on a schedule is selected, users can define when the report is to be run, and where it is delivered, as shown in the below example:
|
The SQL Server Agent service must be started in the database in order for scheduled reports to run. If SQL Server Agent service is not running, an error is received when trying to access a scheduled report in Temenos Infinity. |
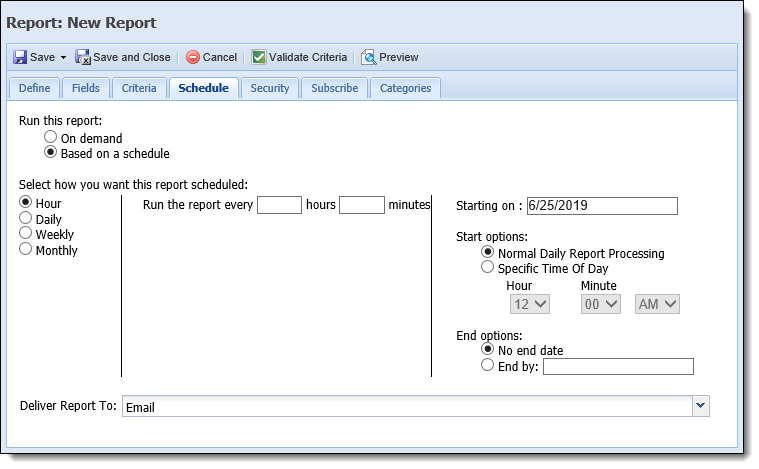
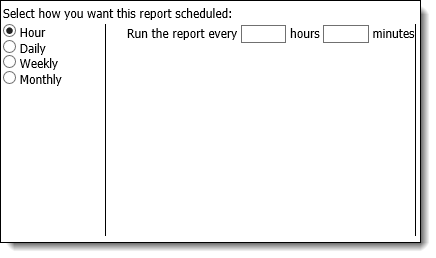
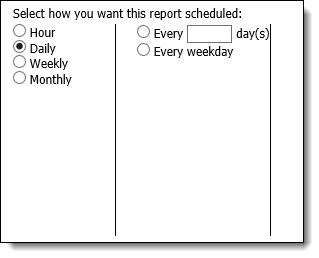
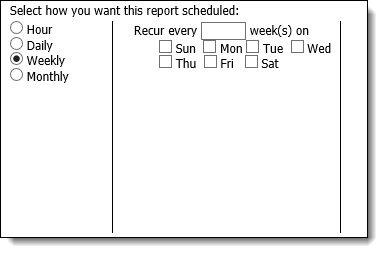
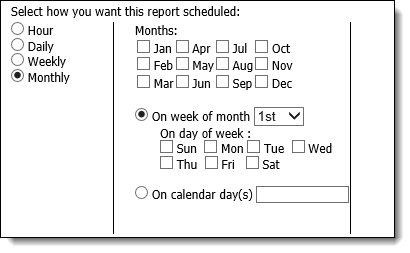
Upon selecting Based on Schedule, the Schedule tab updates to include the following attributes, which provide the ability to define the time configurations, and delivery location, for the report:
| Attribute | Description | ||||||||
| Select how you want this report to be scheduled |
Provides the ability to define the frequency in which the report as run, as well as the start and end dates for the report's generation. This attribute includes the following three sections of information:
|
||||||||
| Deliver Report To |
Provides the ability to select one of the following values from the drop-down list to determine if the scheduled report is delivered via email, or to a Windows file share location defined by the institution:
When set to Windows File Share or Both, additional fields populate within the Schedule tab to define the details for the file being generated. Please see the Windows File Share Configurations section in this topic for more information.
|
When Deliver Report To is set to Windows File Share or Both, the Schedule tab updates to include a Windows File Share Configurations section, as shown in the below image. This section includes the details that must be defined for the file being sent to the share drive.
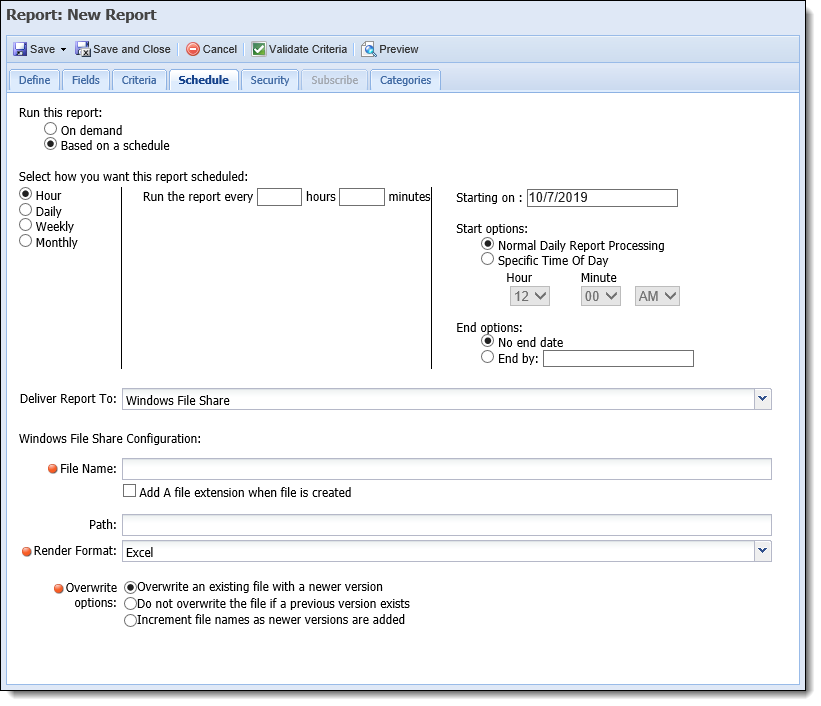
The following required fields populate within the Schedule tab to define the details for the file being generated for the report:
| Attribute | Description | ||||||||||
| File Name |
Enter the name of the file. If it is desired to add a file extension when the file is created, select the check box below the File Name attribute titled Add a file extension when file is created.
|
||||||||||
| Path |
Enter the file path location where the report is to be exported. If a file path is not defined, the report is exported to the File Path location set within the Report Server Credentials section of the General tab in Administrative Settings.
|
||||||||||
| Render Format |
Select an option from the drop-down list to identify the format of the file being generated. This drop-down defaults to Excel, and includes a list of the following values:
|
||||||||||
| Overwrite Options |
Select one of the following options to determine the behavior that occurs each time a file for the report is generated and placed in the share location:
|
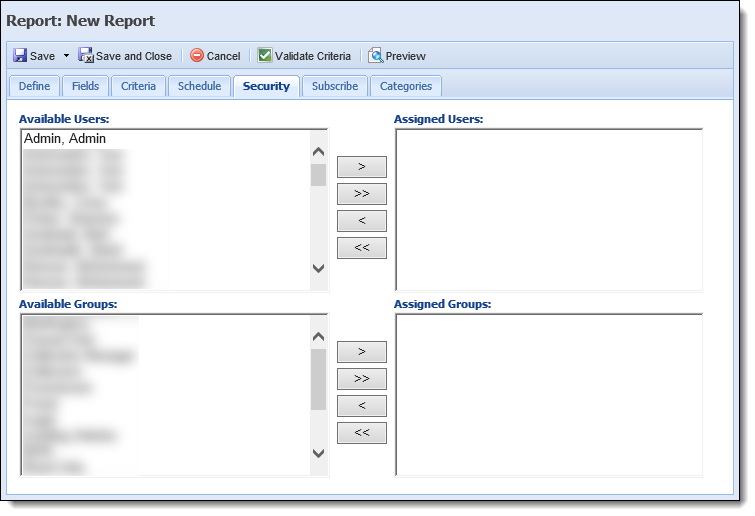
Security attributes enable administrators to assign available Users and/or Groups access to the report.
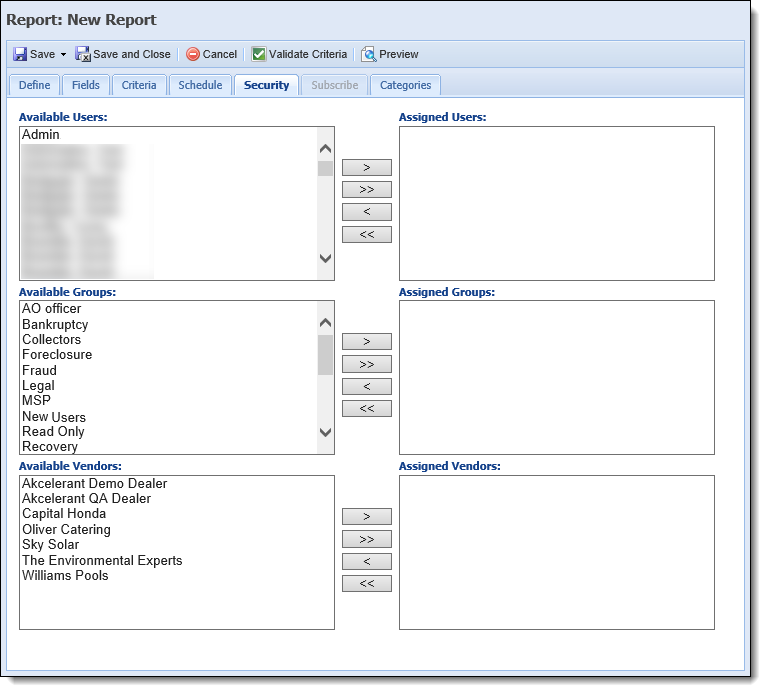
When the Vendor Report parameter is set to true for an Application report, the Security tab appears as follows:
The following Security attributes are defined within the Security tab:
| Attribute | Description | ||
| Assign Users |
Select the desired users from the Available Users list, and move them to Assigned Users list, to provide users access to the report in Temenos Infinity.
|
||
| Assign Groups |
Select the desired security groups from the Available Groups list, and move them to Assigned Groups list, to provide users in the group access to the report.
|
||
| Assign Vendors |
If the Vendor Report parameter is set to true, select the desired vendors from the Available Vendors list, and move them to the Assigned Vendors list, to provide vendors access to the report in a vendor instance of Virtual Capture.
|
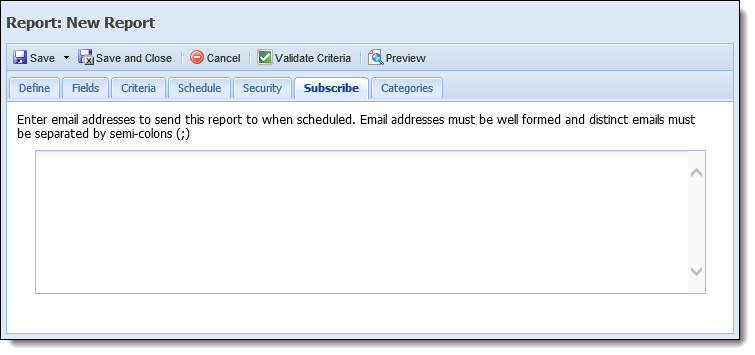
If Based on a schedule is selected in the Schedule tab, and the Deliver Report To attribute is set to Email or Both, the Subscribe tab is enabled.
|
This tab is disabled when a report is set to run on demand, or when based on a schedule and Deliver Report To is set to Windows File Share. |
Users can enter email addresses within the text area to receive the report results once the report is run. For this feature to work, system email settings must be configured in System Management > Administrative Settings > Email Settings.
The Categories tab provides administrators with the ability to assign the report to specific categories.

The following attribute is defined within the Category tab:
| Attribute | Description |
| Assign Categories | Select a category from the Available Categories list and move to the Assigned Categories list to make the report accessible to the category. |
To create a report:
 within the Reports page.
 .
.
The field list that displays is dependent on the Report Type selected in the Define tab. The field list is a feature used throughout Temenos Infinity to define the fields to display on reports, views, and exports. It is also used in criteria building for reports, views, exports, and searches.
The field list is a feature used in criteria building for searches.
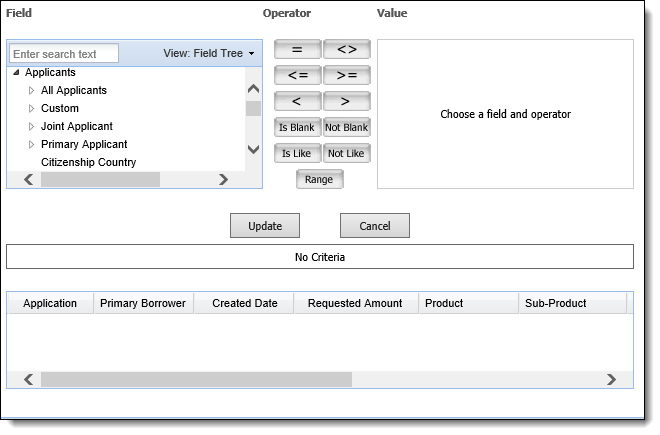
Each field selector window looks the same regardless of how it is accessed. In the below example, the field selector has been accessed through the Fields tab when creating a new report.
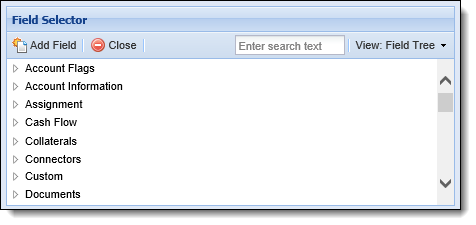
By default, the field selector opens in a tree format with expandable folders and sub-folders.
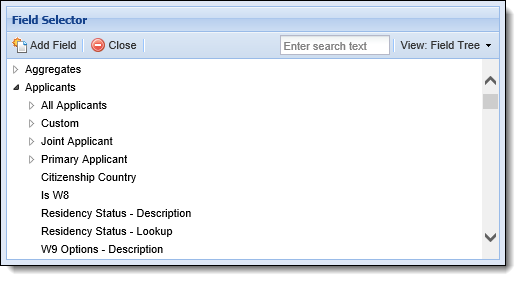
Field Tree
When using the Field Tree format, click the arrow next to the field name to expand or collapse the list of available fields. Expand each section until the desired field is found, or search for the field by entering text into the search text box, and hitting Enter on the keyboard.
Once the desired field is located, highlight the field, and then double-click the field, or select
Once the desired field is located, highlight the field, and then select an operator, define the value, and click Update.
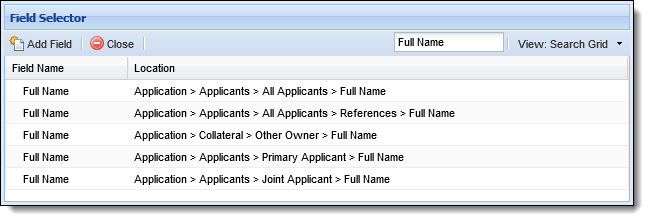
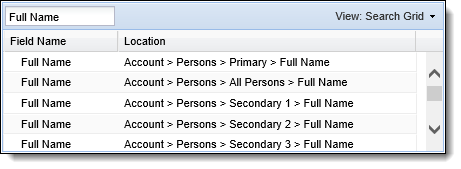
Search Grid
To change the view of the field selector from a tree to a search grid format, click the View drop-down in the top of the field selector window, and select Search Grid.
Using the Search functionality, locate the desired field by entering text into the text box, and hitting Enter on the keyboard. A list of results displays including the field name and location in Temenos Infinity.
Once the desired field is located, highlight the field, and then double-click the field, or select
Once the desired field is located, highlight the field, and then select an operator, define the value, and click Update.
 .
.
 .
. . This feature is only available when the report is saved for the first time.
 or
or  to create the new report and return to the Reports page.
|
If a report is configured to run based on a schedule, and deliver to a Windows File Share location, report server credentials must be defined for the institution within the General tab in Administrative Settings. If a username, password, and/or default file path has not been defined, an error is received when trying to save the report configurations. For more information, please see the General section of the Administrative Settings topic in this guide. |
To copy a report
 . or to retain all changes and finalize creation of the new report.
To edit a report:
 .
.
If changes are made to the report Fields or Criteria, select Save and Edit Design or Save and Reset Design within the Save drop-down to overwrite the report's previous design.
or to retain the changes and return to the Reports page. .
.

 Hour
Hour